Penne Alla Vodka: A simple vegetarian delight with just a wee bite

Image


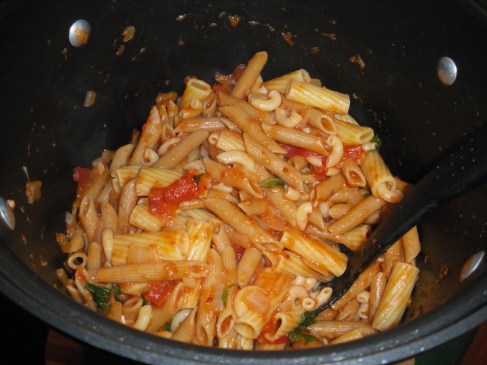
So after a short hiatus caused by multiple distractions, I return to The Cut Up Cook with something simple, easy and delicious that when you tell people you made it they won’t believe that it was all that easy.  Just saying vodka sauce brings to mind this idea that you have spent a bunch of time making a big Italian feast with a delicious tomato sauce that must have been simmering for hours.  However, this particular tomato sauce only simmers for a short time and can actually be a really fantastic weeknight meal.

Image


In total the sauce only takes about 20-25 minutes to complete and can be paired with any short pasta you desire.  In that first picture you will notice that I actually used a couple different types of pasta because I had a partial box or two that needed to get used up.  A couple of cut ups/recommendations for this particular recipe are these.

1)As always I will provide the recipe as it is described in the cookbook I borrowed it from (in this case we are back to Pasta Revolution).  However, I found that when simmering the alcohol in the sauce, the length of time that they recommend almost completely eliminates the alcohol flavor in the sauce, so you may consider reducing this time if you like a little more bite.

2)While I truly believe that some ingredients are interchangeable, there are certain times where those changes should not be made.  In this case, I will admit that I almost always use milk (which is standard in our refrigerator) instead of heavy cream in a recipe, this is one time where I would spring for the cream.  This is a vegetarian pasta with not much in the way of chunky items, so the extra richness that comes from the fat in the cream really makes the dish infinitely more enjoyable.

Image


Penne Alla Vodka

  • 1 28 oz. can of whole tomatoes
  • 2 Tbs olive oil
  • 1/4 cup finely chopped onion
  • 1 Tbs tomato paste
  • 2 minced garlic cloves
  • 1/4 tsp red pepper flakes
  • 1/3 cup vodka
  • 1/2 cup heavy cream
  • 1 pound penne (or any short tube you have on hand)
  • 2 Tbs chopped fresh basil
  1. Pulse half of the tomatoes in a food processor until smooth.  Dice the rest of the tomatoes into cubes and discard the seeds and cores.  Combine both the tomato pieces and puree in a liquid measuring cup at least two cups in size and and the juice from the can to total two cups of assorted tomato parts.
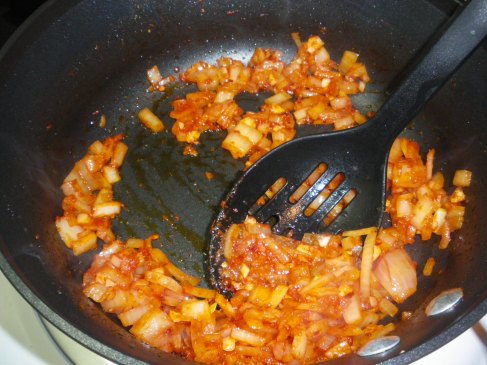
  2. Heat the oil in a large saucepan over medium heat and add the onions and tomato paste and cook until slightly browned and softened (5-7 minutes).  Add the garlic and red pepper flakes and cook about 30 more seconds until fragrant.
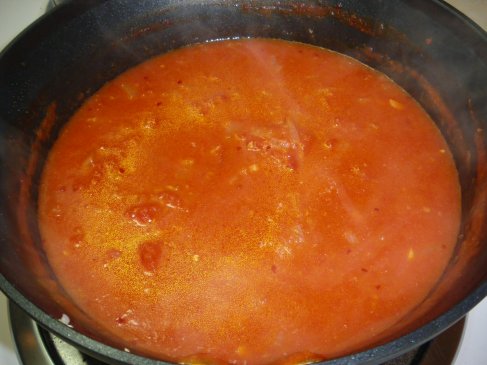
  3. Stir in the tomato mixture and salt to taste.  OFF THE HEAT, add the vodka and return to a medium high heat for 8-10 minutes to cook off the alcohol.  Stir in the heavy cream and cook until heated through.
  4. When your pasta is ready (which you already were doing right?) drain and add it directly to the sauce.  Cook over a medium heat for just a moment, stirring constantly, until the pasta absorbs some of the sauce, just a minute or two.  Stir in the basil and season with salt and pepper to taste.  Serve and enjoy with a sprinkle of Parmesan cheese. 
Mashed Sweet Potatoes: A delicious side with a new twist

Image


I love good mashed potatoes.  They are a perfect side to any meat entree whether it be steak, chicken, or pork.  They are something that can be perfect when prepared correctly and don’t need to do anything really exciting to enjoy it.  However, recent trends have offered up a new take on this classic side that can make it (in my opinion) even better: the dawn of the popular sweet potato!

Image


Sweet potatoes have become maybe the hottest starch around in recent years.  Whether served up as fries or mashed into oblivion, they are a new exciting thing and are no longer relegated to being that holiday side covered in mini marshmallows.  I must point out, I have chosen to use sweet potatoes for this, NOT YAMS.  I think they provide a better vessel in this case.

Image


The cut up today is not the actual recipe.  I did make one change but the overall sentiment is the same as the originator.  The cut up here is really the change to the classic mashed potato.  Other than sweet potatoes, this dish is laced with spinach, shallots, and, my personal cut up because I don’t like blue cheese, goat cheese.  A whole new array of flavors with the sweet starchy background of sweet potatoes.

Image


Mashed Sweet Potatoes with Spinach and Goat Cheese

  • 2 large sweet potatoes (or more, about one per person is appropriate)
  • 1 cup chopped fresh spinach
  • 2 oz goat cheese
  • 1 large shallot, sliced
  • 1 Tbs olive oil
  • 1/4 cup milk
  • salt and pepper
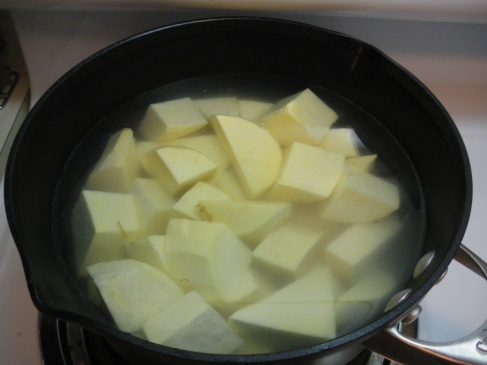
  1. Bring a large pot of water to a boil with the sweet potatoes in it and cook for about 15 minutes until the potatoes are fork tender
  2. In a saute pan, cook the shallots over medium heat in the olive oil until soft and slightly browned.
  3. Combine the sweet potatoes, shallot, spinach, goat cheese, and milk in a large bowl an mash until well combined.
  4. Season and mash again
  5. Serve and enjoy!

Crusty No-Knead Bread: The perfect complement to any soup

Image


I have made it no secret that I have a love affair with bread.  A good starchy slab beats any other food in my book.  My wife is a soup nut.  Especially during these cold winter months, she craves soup often and is always presenting me with ideas she likes for a weeknight soup.  I must admit that one of my biggest food issues is dealing with textures.  As most soups are, I have trouble with a lot of soft or mushy foods so soup on a regular basis can wear me out.  The best way to combat this is to pair any creamy soups with a good piece of hard crust, dense bread. And that is what I have today.

Image

This bread is perfect for a soup.  The outside is dark brown and crunchy and the inside is soft, chewy, and dense.  The best part of this bread is the fact that it is just about as easy as can be.  Just mix the ingredients, let it rise, bake and enjoy.  No busy kneading, no long drawn out shaping processes, and complicated seasonings.  The only down side to this bread is that you have to plan to make it in advance as it rises over night.
Image


The cut ups for this bread are not numerous.  The biggest one is that instead of using regular yeast, I simply just use one packet of “rapid-rise” yeast.  It is a little more than the recipe calls for, but it gets the job done.  The key to this loaf is that when you mix the ingredients the night before, just get everything mixed together and then leave it alone.  There will likely be spots of dry flour but you need not fear, they will be hydrated by the time you get up the next morning.  Also, listen to the bread when you take it out of the oven, yes listen.  As the loaf cools and contracts you can hear the crust popping, snapping, and popping just like a famous breakfast cereal.

Image

Crusty No-Knead Bread

  • 3 cups all-purpose flour
  • 1 packet rapid-rise yeast
  • 1 tsp salt
  • 1 1/2 cups warm water
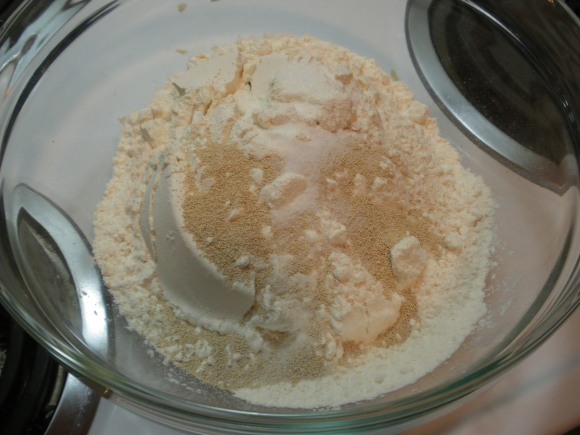
  1. Combine all of the ingredients in a medium bowl and mix just to combine.  There may be dry pockets but they will hydrate.  Let rise overnight (12-18 hours)
  2. Preheat the oven to 450.  When preheated, place a dutch oven in the oven and let heat for 30 minutes.
  3. On a heavily floured surface, form the dough into a loose loaf.
  4. Place the loaf into the heated dutch oven and bake, covered, for 30 minutes.  Remove the lid and bake an additional 10 minutes until the top has reached a dark brown color.
  5. Remove from the oven and place the loaf on a cooling rack and take a listen.  Serve with soup, olive oil for dipping, or make the loaf into a delicious garlic bread.


Gluwein: A boozy blast from the past, perfect for any cold winter party

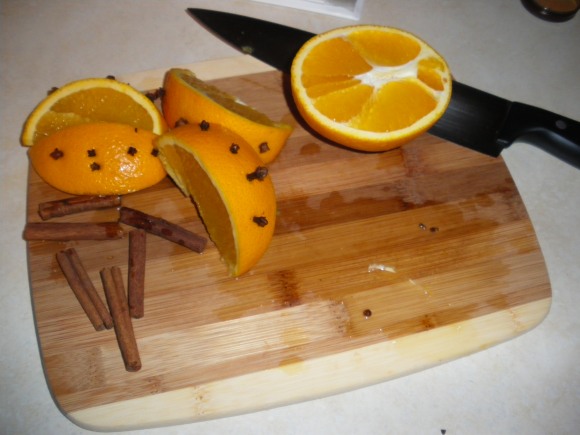
ImageAs I think that I have mentioned before I spent 4 months rooting around Europe during college and that experience was based out of Salzburg, Austria.  We were there from January through April, so when we arrived the weather was cold and the snow was on the way.  Being a 20 year old at the time, I knew that I wanted to get to the nearest bar as soon as possible.  This was all well and good for a while but I knew that eventually, a cold beer just wasn’t going to cut it.  That is when we were introduced to gluwein.  All it really is, is wine that has been mulled with a few spices and some citrus to create a delicious, alcoholic warm beverage.  If you are curious, this would be called mulled wine if a spirit (often brandy or port) were added.

Image


We decided to make this on Christmas to have a festive warm drink for the holiday.  It adds a perfect extra touch on a cold day when you need a little extra warmth.

The cut ups for this are not really changes, but more suggestions.  First of all, when buying the wine for this you are looking for quantity over quality.  I am not advocating using a wine you wouldn’t normally drink, but don’t break the bank going for the good stuff as the flavor will be changed quite a bit during the heating.  Also, feel free to adjust the amount you make without fear.  The recipe is easily pared down and you lose no quality in the process. While the cinnamon sticks really need to be whole, the cloves and allspice can be used ground.  Just make sure that you mix them in well so that they dissolve completely and start with a little and add in small increments so not to over do it.

Image

Gluwein

  • 4 liters of red wine
  • sugar (the amount varies based on wine quality, add until satisfied should start with about 2 cups)
  • 6-8 cinnamon sticks
  • whole cloves
  • 2 oranges
  • whole allspice
  • 2 cups of orange juice
  1. Pour the wine into a crock pot (or just a large pot on the stove over loooooow heat if that is what you have) and turn the heat to high
  2. cut each orange into slices with the rind on.  Stud each slice with about 4 cloves and put them into the wine
  3. Break the cinnamon sticks in half and add them to the wine
  4. add the orange juice and 2 cups of sugar
  5. Let the wine heat for about 30 minutes, stirring occasionally and making sure that it never boils.  If it starts to get really hot, turn the heat down.
  6. Taste the wine to make sure that the sugar is right and the spices are starting to come through.
  7. When the mixture is heated to your liking, serve in mugs and enjoy the winter wonderland.

Mini Buffalo Chicken Meatballs: A perfect gameday treat

Image

With the busy holiday season over it is time to get back to regular blogging.  The one upside of the holiday season was that it gave me an opportunity to cook a lot and spend good quality time with my wife.  Also, Christmas brought me some new cookbooks that give me the opportunity to try some new recipes and share them with all of you.

In honor of my love of football and sports in general, I give you a true gameday treat.  These meatballs include all of the delicious flavors of chicken wings without needing a fryer or have any of the usual mess.  If you are planning on hosting a game day party in the near future, whether it be the college national championship game or the superbowl, these mini meatballs are low maintenance and can be prepped in advance so you can enjoy the sports excitement as well.

Image

A few cut ups of the recipe that I need to mention: first of all, I used chicken breast meat.  After cooking, I was a little disappointed with the color and crispiness of the final product as you will see below.  The first thing you might do to fix this is (like the recipe recommends) use ground thigh meat.  Also, I am going to try when eating the leftovers, crisping the meatballs in a frying pan to get a little crunch on the outside.

Image

Mini Buffalo Chicken Meatballs

  • 2 Tbs vegetable oil
  • 4 Tbs butter
  • 1/3 cup hot sauce of your choice ( I used Frank’s)
  • 1 pound ground chicken
  • 1 egg
  • 1/2 stalk of minced celery
  • 3/4 cup bread crumbs
  • 1 tsp salt
  1. Preheat the oven to 450 degrees. Coat a 9×13 baking dish with the vegetable oil using your hands and set aside.
  2. In a small sauce pan over low heat, melt the butter in the hot sauce until everything is well incorporated and allow to cool.
  3. In a large bowl, combine the hot sauce mixture, chicken, celery, salt, breadcrumbs, and egg and mix until well incorporated
  4. Roll the mixture into small 3/4 inch meatballs and arrange in the pan in a grid pattern, making sure that the meatballs are touching each other.
  5. Roast in the oven for about 20 minutes or until the internal temperature of the meatballs reaches 165 degrees. Allow to cool for about 5 minutes before enjoying.

This recipe comes courtesy of my wife’s Christmas present for me, “The Meatball Shop Cookbook” by Daniel Holzman and Michael Chernow.

Beef and Carrots in Stout: This plus cold night equals perfect

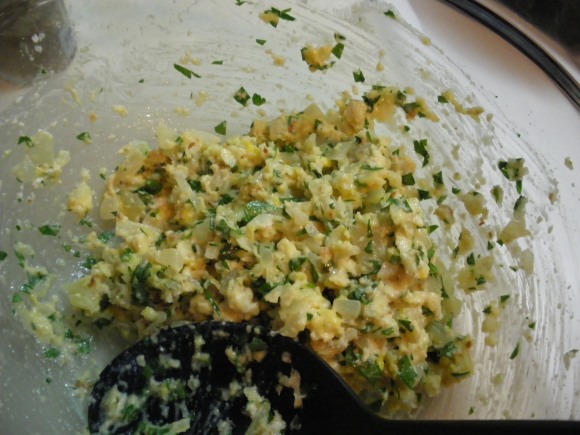
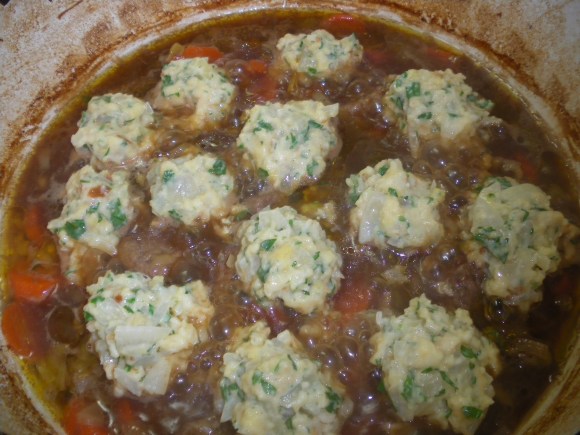
Today, I will let the pictures speak for themselves.  The perfection of this dish speaks for itself.  A couple of quick notes, instead of horseradish, I used 2 parts mayonnaise and 1 part brown mustard.  Also, to clean leeks for those who may not know: slice, unconnect the rings, and soak in water to remove any sand.

Image

Image

Image

Image

Image

Image

Image

Beef and Carrots in Stout: with parsley and horseradish dumplings (from “The Best of Food and Wine)

  • 3 Tbs cooking oil
  • 2 lbs braising beef in chunks
  • 2 large carrots, sliced
  • 1 large leek, sliced
  • 2 oz pearl barley
  • one bottle stout beer
  • 1/2 onion finely chopped
  • 1 Tbs butter
  • 1/4 cup parsley, chopped
  • 2 cups bread crumbs
  • 1 egg
  • 3 large Tbs horseradish
  1. Preheat the oven to 325
  2. In a large dutch oven, brown the meat in batches over medium-high heat in 2 tablespoons of the cooking oil and set aside.  Add the remaining oil and fry the vegetables until the begin to brown then add the barley.
  3. Add the stout to deglaze the pan.  Pour in about 3 cups of water and return the meat to the pot.  Season with salt and pepper.  Bring to a boil
  4. Remove from the stove, cover and put in the oven for about 2 hours.  Add more water if the dish starts to dry out too much
  5. Saute the onion in the butter.  In a large bowl, mix the onions, parsley, bread crumbs, egg, and horseradish.  It will make a very loose, sticky mixture.
  6. After two hours is up return the stew to the stove top.  Form the mixture into golf ball sized dumplings and dot on top of the stew.  Cover and cook 20 minutes, uncover and cook another 10.
  7. serve and enjoy with another nice dark beer.

Pasta Fagioli: A hot soup for a cold winter night

Image

So I must apologize for not posting over the weekend and yesterday.  With the holidays upon us the frenzy of shopping and then ultimately gift wrapping has taken up much of my time.  Also, we have had some crazy weather these last few days as well, there was about half an inch of snow on the ground this morning and caused a little road havoc from what I understand.  But now that those tasks are done, I am back to being focused on this and look forward to the next few posts that I have in store.

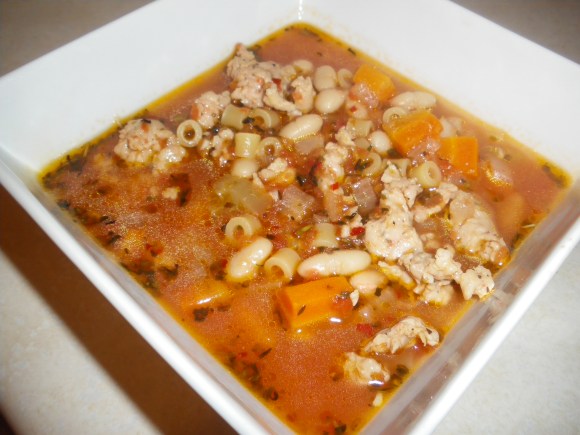
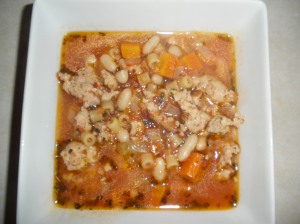
The post for today is really perfect to be writing with dark clouds in the sky and water/ melting snow all around.  This is a soup that will warm you from the inside.  It has a nice spice and a great Italian flavor.  When the weather outside is frightful and you live in a home with no fireplace, sometimes the soup is what needs to be delightful.

Image

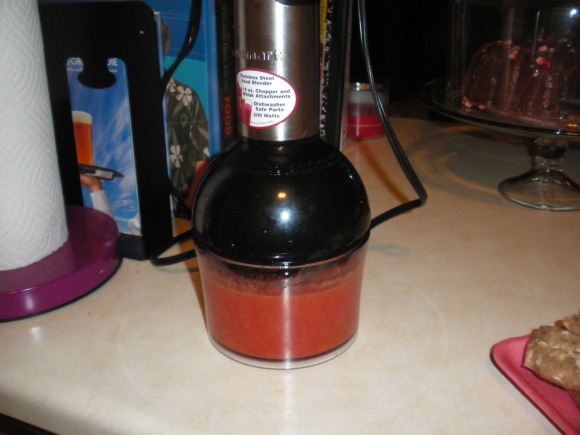
The cut ups in this recipe are minimal.  My wife found it online somewhere, likely from another food blog.  The one major change that I made was to use chicken sausage as opposed to pork.  It is a little healthier and when dropped in a soup and lean meat can often be really nice.  Also, if you are someone who thinks that adding pepper flakes to a dish is a bad idea you need to resist leaving it out in this case.  This soup is supposed to have a little zip and it really rounds out the dish well.  Also, if you shop at a basic grocery store like I do, you may find it difficult to find 15 oz can of crushed tomatoes, they often only come in the 28 oz variety.  I remedied the situation by using a can of diced tomatoes and running them through the small food processor I have.  It serves the purpose and you don’t have an excess of crushed tomatoes lying around needing to be used.

Image

Pasta Fagioli

  • 1 Tbs olive oil
  • 1 onion, chopped
  • 2 cloves garlic, minced
  • 1 carrot chopped
  • 1 stalk of celery, chopped
  • 1 lb. chicken Italian sausage
  • 1 Tbs Italian seasoning
  • 1 1/2 tsp red pepper flakes
  • 1 15 oz can crushed tomatoes
  • 3-4 cups chicken stock
  • 1 can cannellini beans
  • 1 cup ditalini pasta
  1. Heat the olive oil in a large pot over medium high heat.  Add the onion and cook until it just begins to soften.  Add the carrots and celery and cook until everything is tender.  Add the garlic and cook until fragrant.
  2. Add the sausage and crumble as it cooks.  Cook until well browned.  Add the pepper flakes and Italian seasoning and cook until you can smell both, about thirty seconds.  Add the tomatoes and stock
  3. Bring to a boil, reduce heat and simmer for 30 minutes.
  4. Stir in the beans and pasta.  Simmer for about 8 minutes or until pasta is tender.
  5. SERVE AND ENJOY

IMGP0209

Quinoa Fajita Burritos: A Mexican treat that needs no meat

Image

I don’t even try to hide that I often feel that no meal is complete without the addition of meat.  There is something not quite as satisfying in a big dinner when there is little substance involved. The few times that I enjoy a meal without a carnal inclusion I find that what makes it worth while is a hefty starch based main ingredient.  I have to accept these once in a while to appease my less carnivorous wife and to keep myself from eating too much of the good meat.  So today I offer a meatless dinner that will leave you full and satisfied.

Image

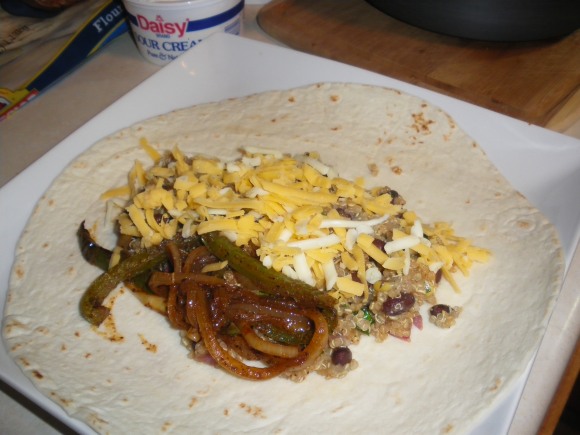
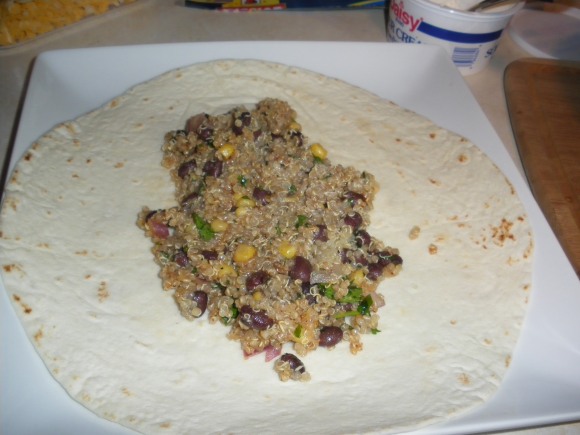
I love a good burrito and that craving has to be satisfied at least once in a while.  And a burrito is always enhanced when you include softened peppers and onions.  They add a nice bite to any Mexican meal, but included in a burrito gives the appearance of meat when there are no big chunks in the burrito.  The base of this burrito is a real treat.  I can still remember the first time anyone mentioned the idea of quinoa to me.  My sister had discovered it at college and insisted on having it when she was home for the Summer.  I resisted initially, but after trying it a few different ways, I realized that it was just another grain to offer as a side dish, much like rice or pasta.  Suddenly, I was exposed to a new variety of options when it came to starchy side dishes.  Flavoring the quinoa with a Mexican flair makes it the perfect medium around which to construct this burrito.

Image


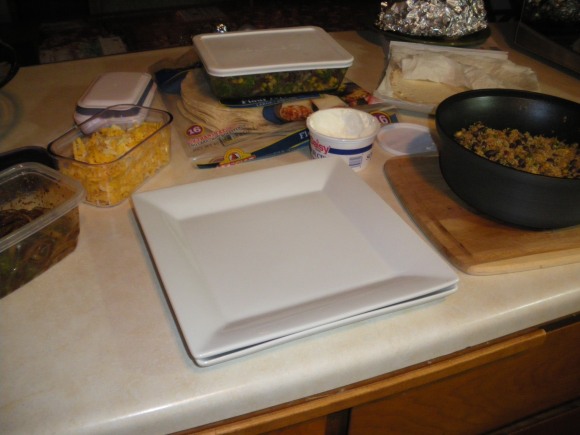
A couple of quick cut ups for today’s meal.  First of all, I see no need to purchase taco seasoning from the market.  A well stocked spice cabinet includes everything you need to get the flavor of taco seasoning.  I use small amounts of: chili powder, paprika, salt, pepper, garlic powder, ground cumin, a pinch of cayenne if you want heat, and a pinch of red pepper flakes.  You can use these, but if you don’t have all of them or don’t want to try seasoning on your own, go for the taco seasoning.  Also, instead of simply adding black beans and tomatoes to the quinoa, I added a few large spoonfuls of my corn and black bean salsa to give the quinoa it’s body.

Image


Quinoa Fajita Burritos

  • 2 bell peppers, cut into strips
  • 1 onion, sliced
  • 1 cup quinoa, cooked to package specifications
  • corn and black bean salsa (or 1 can black beans and 1 15 oz can diced tomatoes)
  • shredded cheese
  • sour cream
  • taco seasoning
  • flour tortillas
  • salsa
  1. Saute the peppers and onions in a skillet with a little bit of taco seasoning until softened.
  2. Stir the bean salsa into the quinoa and season with a little taco seasoning
  3. Construct your burrito with the quinoa and peppers and onions.  Complete with your choice of sour cream, cheese, salsa or any other accouterments you might like in your burrito.
  4. Roll the burrito tucking in both ends.  If you like a little crunch, grill the outside of your rolled burrito in a skillet or on a griddle to enhance the outer texture.

Corn and Black Bean Salsa: Quick, easy, and versatile

Image

I truly believe that in cooking sometimes the last thing you want to do is make a whole bunch of different things.  However, if you can create one thing that can serve multiple purposes then you have a real  advantage in making life easy.  This salsa is the perfect example.  This week we had two different Mexican inspired dishes on our menu.  You will see one tomorrow and the other in the next week.  This chunky, fresh salsa found its way into both meals.  And actually if we decided to, dipping was not required.  This is my very favorite dipping salsa.  I exclude the tomatoes because I don’t like them but you can add them if you want.  The beans, and actually the cumin in the dish make it a very refreshing change from your typical everyday salsa.

Image

The two versatile ways that I used it this week were actually to enhance starches.  For the meal you will see tomorrow, I added it to the quinoa that went into our vegetarian fajita burritos.  It gave a nice body and richness to the main ingredient. The other time I used it as a non-dip, I added some spoonfuls to a brown rice that was a side dish for a Mexican spiced chicken.  The absolute best part of this salsa is that there is no cooking involved, just add all the ingredients into a bowl, mix, and refrigerate for a few hours to merry the flavors.  Its quick and easy and can be used as a great party appetizer or incorporated into other dishes.

Image

Corn and Black Bean Salsa

  • 2 cans black beans, drained
  • 1 can whole kernel corn, drained
  • 1/2 cup cilantro
  • 6 Tbs olive oil
  • the juice of two limes
  • 1/4 cup red onion, minced
  • 1/4 cup green onion , minced
  • 1 1/2 tsp cumin
  • 1/2 cup tomatoes, chopped
  1. Mix everything except the tomatoes in a bowl. Refrigerate until ready to use.
  2. When ready to serve, mix in the tomatoes

JUST THAT EASY!

Peppermint Chocolate Bundt Cake: A holiday treat

Image

We try to limit our dessert intake as much as we can in our apartment.  My wife has quite a sweet tooth which she has trouble controlling sometimes and I don’t really need dessert at all but enjoy it when available.  So we have come to the decision that we will only make dessert once a week.  If it is gone after a day then we don’t have any more for the rest of that week and if it lasts all week that’s great.  So when deciding what to make this week I asked my wife what she would like because she enjoys dessert more than I do and she had a one word answer, holiday.

Now this did not provide me with too much inspiration.  But after careful consideration I was able to narrow down my choices.  First of all, sugar cookies are to come when Christmas gets a little closer, so vanilla was out.  Next, Thanksgiving is over and I don’t love pumpkin all that much so that was out too.  Ginger/spice got careful consideration, but I have a favorite ginger cookie recipe that I really like and don’t have it in my possession so I will wait and do that soon.  So I realized that the best medium to use was chocolate.  The question was, how do I turn chocolate into holiday?  The answer, peppermint.  The marriage is common and easy to execute so I decided that I would wing it and try my hand at some original creation, and I must admit I did a pretty darn good job.

Image

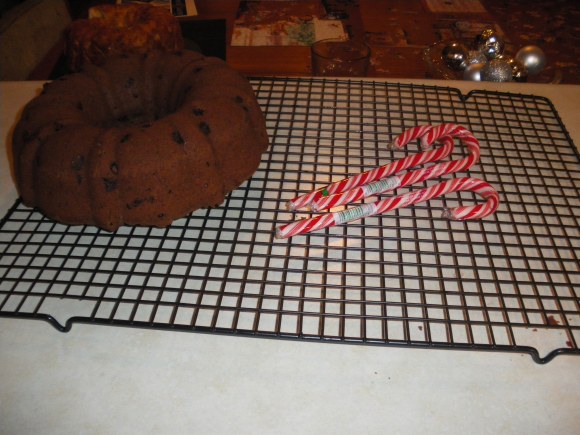
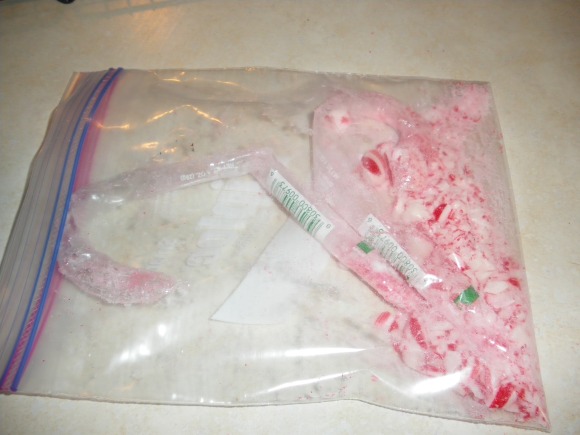
The cut up today is pretty much the whole recipe.  I used a basic chocolate bundt cake recipe and a basic white sugar glaze recipe, then flavored them by my own hand.  The nice thing is, is that nowadays we have the ability to insert peppermint flavor into anything easily with peppermint extract.  If you are used to making chocolate bundt cake and/or basic sugar glazes and frostings.  The only new thing necessary is the peppermint extract.  The chocolate chips and candy canes are optional but highly recommended.  Also, the tip of the day is to break up the candy canes in their wrapper, inside a ziploc bag.  This allows you to contain all of the candy bits, and the wrappers come right off instead of having to fight that awful plastic.

Image

Peppermint Chocolate Bundt Cake with Peppermint Glaze

Cake

  • 2 sticks unsalted butter
  • 1 1/2 cups sugar
  • 4 large eggs
  • 1/2 cup sour cream
  • 1 tsp vanilla extract
  • 1/2 tsp peppermint extract
  • 2 1/2 cups flour
  • 1/2 cup unsweetend cocoa powder
  • 1 tsp baking powder
  • 1/2 cup milk
  • 1 cup chocolate chips

Glaze

  • 1 1/2 cups powdered sugar
  • 3 Tbs milk
  • 1/2 tsp vanilla extract
  • 1/4 tsp peppermint extract
  • 2 candy canes
  1. Preheat oven to 325 and spray bundt pan with non-stick cooking spray or coat in butter and flour.
  2. Cream butter and sugar together in stand mixer or with electric hand mixer until pale yellow.
  3. Add eggs one at a time and mix until fully incorporated. Next add sour cream, vanilla extract, and peppermint extract and mix until smooth.
  4. Now add half of the flour, cocoa, and milk and stir until fully incorporated. After mixed, add the rest of the flour, cocoa, and milk and add baking powder and mix until batter is well mixed.  If desired, fold in the chocolate chips.
  5. Scrape the batter into the prepare bundt pan and bake for about 1 hour. A cake tester should come out clean.
  6. In a separate bowl, prepare the glaze.  Mix the powdered sugar, most of the milk, and both the vanilla and pepper mint extracts.  If the glaze is too thin, add a little more sugar and if still a little thick add more milk until a thin paste forms.  Crush candy canes in a zip-top bag and add bits to glaze.
  7. When cake is cool enough to handle, turn out of the pan and allow to cool COMPLETELY!  When completely cooled, pour glaze over the cake and allow to set.  Slice and serve

Here is a look at my serving suggestion:

Image